Showing posts with label Sandy. Show all posts
Tuesday, June 19, 2012
Here's A "Cool" Summer Project For You!
How "cool" are these? I felt 10 degrees fresher just looking at the pic!
I love how the citrus slices are quilted to look like they have sections, and those napkins really set them off.
(And, I have no idea why my text is suddenly backed by white. Go figure--I can't get rid of it.)
The pattern is a freebie from Phillips Fiber Arts, and the download is here: phillipsfiberart@danemcoweb. It uses their 12-degree wedge ruler.
But, really, how hard could it be to make your own 12-degree wedge ruler? Okay, I admit it, I didn't make my own--I bought one when it was on sale for a few bucks. Always happy to avoid math whenever possible.
~Sandy
Saturday, June 16, 2012
Fun Project: Miniature Quilt for Silent Auction
As per my usual MO, I finished this quilt about an hour before I had to leave for the Columbine Quilt Guild meeting. I made it for the annual silent auction. This little quilt is so colorful that it makes me smile.

Since I'm still loving the black-with-brights combo, I trotted out my bright fabric strips again.
The idea for the wavy strip-pieced border strips is from Janice Gunner, whose article and instructions appeared in the April 2002 Quilters Newsletter. She sews alternating long, skinny wedges together to make the strip sections.
If you're interested in how I created the flower, read on:
I created the pattern for the flower by tracing the circumference of a plate onto tagboard. Then, I folded the circle into eighths (avoiding math!), and cut out one of the resulting wedges to use as a template for the eight flower sections.
When I cut out the eight wedges, I just added a 1/4" seam allowance all around. I positioned the wedge template on selected sections of my strip-pieced large rectangle.
Once the eight sections were sewn together, I put the intact tagboard circle (I had made an extra) onto the sewn flower and turned under the outer edge using the template as a guide. Starch helped set the fold.
Since the center of the flower was one big lump from all those seams coming together, I just cut it out, because I knew I was going to add a small center circle to the flower.
I machine appliqued the flower and border wavy lines to the black background fabric using a (somewhat) invisible stitch.
It still looked like it needed something, so I added some bobbin-work stitching around the center of the flower, the outside of the flower, and on the leaves. I used all six strands of cotton embroidery floss and hand-wound it into my bobbin. For the top thread, I used monofilament.
Finally, I quilted everything together, using outline stitching around all the appliqued pieces, and rather small stippling in the rest of the background.
I liked it so much that I wanted to keep it for myself! Actually, I have enough strip-pieced sections to make another one, so I think I will. I'll have to vary the design somewhat, though. Who wants to make the same thing twice when you can do something different?
~Sandy
Friday, June 8, 2012
Frivolous Friday...New Grandbaby!
Say "hello" to the newest member of my family, Lucas James Schnitker, born June 2, 2012, and weighing 7 lbs., 9 oz. His proud parents are Allison (my youngest daughter) and Blake; and his very happy Big Sister, who is holding him in the photo, is Myah (3 1/2). Myah adores "Woocas".
Luke is my seventh, and probably last, grandchild.
Life is good!
Luke is my seventh, and probably last, grandchild.
Life is good!
Sunday, May 13, 2012
Serial Quilter
Oh Sandy, when I saw this I thought of you and our long arm group! I love it! This one is for Cathy! (source and source)
More options here! Enjoy!
Robbie Marie
Sunday, April 29, 2012
Great Article About Copyright Issues in the Quilting World
I came across this article in Quilting Board today, and thought it worth sharing. It does answer some questions, and Kate Spain, a designer who was recently involved in a lawsuit, has some wonderful compliments for quilters. Above is a photo of some of her designs from her website. Love her fabrics!
http://katespaindesigns.blogspot.mx/...g-forward.html
~Sandy
Sunday, April 15, 2012
Baby Quilt in the Works

I just finished the top of the quilt I am making for my soon-to-be grandson due the last week in May.
This quilt has been fun to work on, as I love all of the fabrics. I wanted it to be very bright! Did I succeed? I'm so in love with using black and white with bright fabrics!
I designed this in Electric Quilt, using two "wonky" foundation-pieced blocks from the EQ Library. I found the dinosaur shapes online and enlarged them for the applique.
I also plan to make two fitted crib sheets from the bright blue wavy fabric in the quilt and this dotted fabric:
If you ever want to make crib sheets to coordinate with baby quilts you make, here are some easy instructions from "P.S. I Love You Baby Collection" by Lynda Milligan and Nancy Smith:
You will need:
2 yards fabric
4 1/2 yards 1/2" wide single-fold bias tape (optional)
1 yard 1/4" elastic
matching thread
1. Cut a rectangle the entire width of the fabric x 68".
2. Cut out an 8" square from each corner of the rectangle. See illustration below:

3. With right sides together, pin and stitch edge "b" to edge "a" of each corner. Use 1/4" seam.
4. Fold bias tape in half lengthwise and press. Slip folded edge over raw edge of sheet and pin. Machine stitch bias tape using a straight stitch or small zig-zag. Optional hem: To eliminate bias tape, press under 1/4" then 1/4" again to make hem. Stitch.
5. Using 9" length of elastic, pin the center of the elastic to the wrong side of each sheet corner with the edge of the elastic about 1/8" from bias tape or hemmed edge. Machine stitch from this center point along elastic with a zig-zag stitch, stretching elastic as tightly as possible. Start from center and stitch to other end of elastic. Repeat for other end of elastic. Repeat for other corners.
I have made a number of these sheets for my grandkids. They last forever if you use quilt-shop-quality fabrics, and it's so nice not to be limited to the pre-made sheets in the stores.
~Sandy
Friday, March 23, 2012
Just Call Me Frog Lady


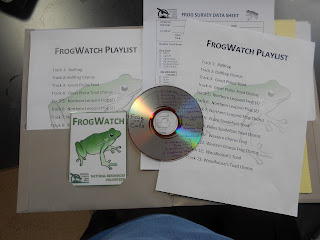
I admit it--I love frogs and toads. They're "cute" (?) and I just love the way they sound (better than a lullaby, in my book). Their choruses are my favorite summer nighttime sound. So, when Dale and I found out about the volunteer programs for Jefferson County Open Space Parks, guess which program was my first pick?
Dale and I signed up as Open Space volunteers, requesting Pine Valley Open Space Park, just a couple of miles down the road from us. In addition to my tracking and charting frog calls and choruses, we will be weed mapping and inspecting trails. Dale will also be observing Peragrine falcons at Cathedral Spires, which is also close to us.
the lake at Pine Valley
Our volunteer stints even include Cool Gear to make as feel Really Important, like this special vest and red-filter flashlight that won't freak out those little frogs at night:
I have been doing my homework: listening to and memorizing the calls of six local frogs/toads. By the time I start next month, I think I'll be ready!
Ribbit! Ribbit!
Fun Facts:
Frogs are smooth and slimy or wet, while toads are bumpy and dry.
Frogs love water--toads not so much.
Frog hind legs are longer than toad hind legs (toads walk more than jump).
Most toads have poison glands behind their ears (!)

Check back in next month for updates on this adventure!
For the Organizationally Impaired--A Handy Purse Insert!
I decided to work on a non-quilt project
this week. I had purchased this pattern from Studio Kat Designs a couple of weeks ago, because I have REALLY been needing one of these. My purse organization was basically nonexistent.
So, look at this handy little thing. Whenever I switch purses, I can just lift this whole baby out of one and plop it down into another. Now, that's convenience! The pattern includes a larger size, too, but I usually carry fairly small purses.
The outside has four pouch pockets, and the inside includes a credit card section,
a zippered shallow coin pocket, and paper bills holder.
Also inside is a phone pocket and elastic loops for pens.
I love this little thing! Now I want to make a bunch of funky purses!
Tuesday, January 31, 2012
Comin' along

Woohoo! Myah's quilt top is finished except for the final two borders. I'm very happy with it. It will be fun to help decorate her new purple room.
Thursday, January 26, 2012
Dresden Plate Flowers and Bobbin Work
I have been working on Myah's purple quilt all week (the one I blogged about recently). I like to try at least one new thing I have never done before whenever I make a quilt, and this time I have made Dresden plate blocks for the first time. They are so gorgeous.
I wanted to add texture to the centers of the Dresden flowers, so along with adding some ric-rac, I decided to also add some bobbin work stitching. If you're not familiar with bobbin work, it is a simple technique for using heavyweight threads, yarns, and even ribbons to enhance your work.
Since you can't thread those heavy materials through a machine needle, you put them into the bobbin instead, by hand winding.
Then, rather than sewing your item from the top side, you flip it over and sew from the back.
In this way, the bobbin stitching will show on the top. Cool, huh? Here's what I ended up with:
And here's the completed Dresden flower. I just love it.

I'm having so much fun working on this quilt. Check back for further developments!
Sandy
Sunday, January 22, 2012
Just in case you have seen this…
If you didn’t see this on “Quilt in a Day” with Eleanor Burns several years ago - or you just need a smile - this will make you smile, I promise! Enjoy, and thanks for sharing it with us, Sandy!
The video was used by Eleanor Burns for one of her "Quilt in a Day" episodes. The man is her son, Orion and the woman is an employee. They had a lot of fun doing it. The lyrics are by Cathy Miller.
Would you like another musical / quilting video?? This will make you laugh, too!
Thanks, again, for sharing, Sandy!
Tuesday, January 17, 2012
EQ!


I LOVE working in my EQ7 program.
Yesterday, I sat down and designed a quilt for my granddaughter Myah who will soon turn three (see top photo).
Big changes coming up in her life--she will have a new baby brother in a few months and will be moving into a new house. Her bedroom in that new house WILL be purple, she says, and, of course, she will be moving up to a "big-girl" bed!
Now, that baby quilt Grammie made three years ago just won't cut it on a "big-girl" bed.
Hence, the quilt I designed yesterday.
After a blissful hour last week in Creative Needle, one of my favorite quilt shops, I emerged with my purple treasures (see next two photos). Okay, I didn't use butterfly appliques on the quilt, so why is the focus fabric cut out like a butterfly? I wanted to play around with the photo in Photoshop (just having some fun).
Back home, I scanned all of my new fabrics into EQ. That's the feature I most love about this program. Since I can design blocks and quilts with my actual fabrics in them, I know exactly how a quilt will look before I begin cutting away.
And I can determine if I have enough of each fabric for the design I have chosen, as the program displays yardage requirements. If my yardage printout says that I need 3/4 yd of that dark accent fabric, but I have only 1/2 yd., I know that I need to remove some of it from my design and replace it with a different fabric (or change my design).
For Myah's quilt I decided I wanted to create a strip design with some unpieced strips along with various types of pieced blocks in the other strips. I wanted the quilt to be feminine, so I chose two types of basket blocks and a petal dresden plate block.
After fiddling, rearranging, adding, removing, and resizing for NUMEROUS hours, the above design is my finished creation. I like it!
Okay, all this computer stuff is fun, but now it's time to get to the cutting and sewing!
~ Sandy
Thursday, December 29, 2011
Christmas Eve Dinner at the Smiths'


Christmas Eve dinner is my favorite part of the holidays. My three daughters, sons-in-law, and grandchildren usually get together at our house for a special dinner and gift-opening. This year Dale and I had lots of help from the three "big" grandkids, as they had spent the night after our Nutcracker evening downtown. They helped polish silver, fix food, make place cards, and set the table. What a great crew--Braeden even peeled all the potatoes for me! The girls took everyone's "orders" and served them. Wonderful!
Holiday Family Fun


A highlight this year was taking our three oldest grandchildren, Braeden (11), Brooke (7), and Ellen (6) to see The Nutcracker Ballet downtown at DCPA. The girls got fancy new dresses and Brae got a new sportcoat and dress shirt. What ladies and gentlemen we all were! After the ballet, we had dinner at The Cheesecake factory and enjoyed the seasonal lights on 16th St. Mall. A very special day!
Friday, November 25, 2011
A Special Thanksgiving Tree


I put up a Thanksgiving "tree" out our house this year. It's actually just two big branches from a very large pine tree that blew over in the wind we had last week and nearly hit our house. I asked my daughters, sons-in-law, and grandkids to bring ornaments to hang on the tree that represented things they're thankful for. What a special tree this turned out to be! I was especially touched by the ornament that my 11-year-old grandson made that thanked his parents. What a keeper! I think I'll frame it for them.
Wednesday, November 16, 2011
Thanks, Freddy, Gwen, and Tina!


I am SO excited--I won a blue ribbon at our guild's annual challenge Monday night! I don't think I've ever before won any kind of a ribbon for ANYTHING, so, naturally, I have admired and petted it a lot. Making it even more exciting is the fact that Judy won a ribbon, too. We're on a roll, girls!
I owe this fun quilt to Freddy Moran and Gwen Marston, who inspired me with their book that I posted a blog about earlier. As soon as I got my hands on this book (thanks, sister Linda!), I knew it struck a chord with me. From my stash I put together many different blocks in various bright color combinations, using lots of black and white fabrics to pop the colors.
The tree block, which is foundation pieced, was designed by Tina Curran, whose quilt "Dancing Trees" appeared in the Dec/Jan 2010 Quilter's Newsletter magazine. I resized the block for this quilt. Making "wonky", skewed blocks is really fun--I highly recommend it. It's a good thing that the challenge entry rules included a size limitation, or I'd still be adding borders. Since I had to stop, I now have lots of blocks ready for another quilt. Oh boy!
Subscribe to:
Posts (Atom)